The Best Chocolate Cake Ever
I have tried so many chocolate cake
recipes over the years.
All have been eaten and thoroughly enjoyed
but I never felt as if anyone of them
quite 'hit the spot'.
I think I may have finally
happened across the best one yet,
but I don't honestly think my quest for the
ultimate chocolate cake will ever stop.
It's too much fun tasting the results.
This recipe is pretty much perfect
but do give it a go and tell me what you think.
I found it very simple to make and the
kids enjoyed cleaning the
bowl and spoon afterwards.
Win-win I guess.
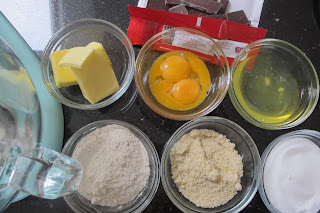
You will need :
for the cake -
125g butter
200g plain dark chocolate, broken into pieces
2tbsp water
3 eggs separated
126g caster sugar
90g self raising flour
60g ground almonds
60g butter
30g cocoa powder
3tbsp milk
250g icing sugar, sifted
1. Lightly butter and line 2 x 20cm
sandwich cake tins with baking parchment.
Pre heat the oven to 180c
160c fan
Gas mark 4
2. Put the broken pieces of chocolate
( minus the piece you have to
taste test of course )
into a heatproof bowl
along with the butter and water.
Put the bowl over a pan of water
and heat gently until the contents of the
bowl have melted.
Stir to mix well and set aside to cool.
3. Combine the egg yolks with the sugar
into a mixer and blend until fluffy and pale.
You can use an electric whisk for this
too.
4. Stir in the now cooled chocolate mixture
and then gently fold in the flour
and ground almonds
until all combined thoroughly.
5. In a separate bowl,
whisk the egg whites until they
are firm but not very stiff.
They will feel firm enough to hold the
bowl above your head,
if you are brave enough to try it.
6. Pour the mixture into the lined
cake tins and bake in the oven
for 25 minutes,
or until a skewer comes out clean
from the cake.
7. Leave on a cooling rack for about
10 minutes to cool in the tin.
Then turn the cakes out onto the rack and
leave to cool completely.
crack on with the fudge icing.
Melt the butter in a pan over a medium heat.
Stir in the cocoa powder and stir for
approximately 1 minute.
Remove from the heat and slowly
add the milk until combined.
The mixture will thicken with the milk
so be careful it does not become too thick.
If this should happen add a little more
milk until you have a thick cream consistency.
9. Now gradually add the sifted icing sugar
to the ganache mixture.
There is a chance that the mix becomes
a big lump of dry ingredients here.
Should the worst happen don't panic.
Just put everything into your mixer
and starting on a slow speed
allow the mixer to blend
it all together for you.
it resembled a smooth whipped cream
consistency.
Set aside to cool and firm up
or you could leave it in the fridge
for a short time which speeds up the
process.
As you've probably guessed,
I had this experience myself when I first
made this recipe.
10. Once firm enough,
assemble the cake by putting a
dollop of fudge icing onto the
cake plate to hold the bottom sponge
in place.
I used two generous table spoons
of the fudge icing into sandwich
the cakes together but you could
more or less.
Just remember the more filling you
put in the middle could mean
you don't have sufficient to cover the cake.
Cover the cake with the remaining
fudge icing and decorate.
I hope you enjoy this delicious recipe.
It will definitely be a firm favourite in
the Busy Bee house
from now on.
On a slightly different note,
BAKE OFF IS BACK.
I am a very happy
Busy Bee.
The anticipation of getting to see
all the new contestants
this year and watch
their journey through the baking
challenges from Mary and Paul
is such a rush.
We are all such huge fans here
at home.
I hope you all enjoy the series too.
Until next time,
enjoy your day.
Bernice
x


